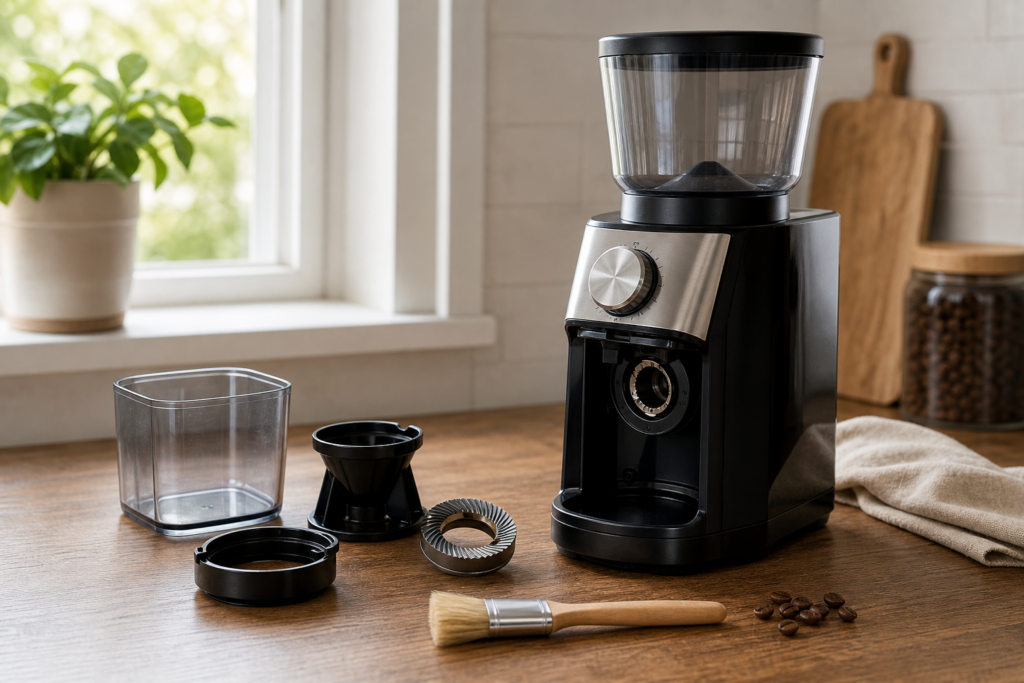
Cleaning a burr coffee grinder removes trapped grounds and oily residue that can make fresh coffee taste stale. It also keeps the chute moving freely and helps the adjustment mechanism behave consistently. For most home grinders, a light cleaning every one or two weeks and a deeper cleaning every month or two is a sensible starting point, although dark roasts and heavy use may require more frequent care.
The safe method is simple: unplug the grinder, empty the hopper, remove only the parts the manufacturer identifies as removable, brush or vacuum away dry debris, wipe washable pieces separately, and let every part dry completely before reassembly. Water should never enter the motor, burr chamber, or electrical controls.
Grinder designs differ, so keep the manual nearby. The steps below apply broadly to electric conical and flat-burr home grinders, but the correct direction for releasing a burr and the approved cleaning materials depend on the model.
What You Need Before You Start
Choose a clear, dry counter with good lighting. A grinder brush with firm natural or nylon bristles reaches around burr teeth without leaving lint. A small handheld vacuum can collect loose grounds, while a clean microfiber cloth handles the hopper and exterior.
You may also need mild dish soap for parts explicitly labeled washable and grinder-cleaning tablets approved for your machine. Keep water, wet towels, and sprays away from the grinder body.
- A grinder brush or clean, dry pastry brush
- A small vacuum with a narrow attachment
- Dry microfiber cloths
- Mild dish soap for washable removable parts only
- The grinder manual or manufacturer cleaning guide
Step 1: Unplug and Empty the Grinder
Disconnect power before removing the hopper or reaching near the burrs. Pour remaining whole beans into an airtight container. Run the grinder only if the manufacturer recommends a brief emptying cycle, then unplug it again. Never place fingers or tools in a powered grinder.
Tap the hopper gently over a bin to release beans caught near the gate. Avoid forcing the adjustment ring while beans are wedged between the burrs; this can strain the mechanism.
Step 2: Remove the Hopper and Upper Burr
Mark or photograph the current grind setting before disassembly. Remove the hopper according to the manual, then lift or rotate the upper burr carrier in the documented direction. Set small washers or tabs in order so they return to their original positions.
Not every grinder permits burr removal. If the manual says the burr assembly is fixed, clean it in place. Forcing a locked component can disturb calibration or damage plastic threads.
Step 3: Brush Away Grounds and Coffee Oils
Brush the upper burr on both sides, working around each cutting edge and the carrier. Brush the lower burr, chamber walls, and exit chute while keeping the grinder upright. Turn components only as the manual permits.
Use the vacuum to lift loosened particles without striking the burrs. Coffee oils often appear as a thin brown film. A dry cloth can remove residue from accessible non-sharp surfaces, but do not use rice as a cleaning shortcut. Uncooked rice can be harder than expected, create fine starch dust, and may damage or clog a grinder.
Step 4: Wash Only Approved Removable Parts
Many plastic hoppers and grounds bins can be hand-washed with warm water and mild soap, but some develop cracks, cloudiness, or static after dishwasher cleaning. Follow the manual. Keep metal burrs dry unless the manufacturer explicitly authorizes washing.
Rinse washable parts thoroughly and air-dry them until no moisture remains in seams or screw holes. Reassembling a damp hopper can introduce water into the burr chamber and cause grounds to clump.
Step 5: Clean the Chute and Exterior
The exit chute is a common hiding place for compacted grounds. Use a narrow brush from the accessible side and vacuum what falls free. Do not insert metal picks that could scratch an anti-static flap or reach moving components.
Wipe the grinder exterior with a barely damp cloth, then dry it. Apply cleaner to the cloth rather than spraying the machine. Pay attention to the dosing button and ledges where grounds collect, without allowing liquid around controls.
Step 6: Reassemble and Recalibrate
Return the lower and upper components in their correct orientation, lock the burr carrier, and reinstall the hopper. Move the grind dial only as the manufacturer directs; some grinders should be running when adjusted finer, while others should be empty and stopped.
Add a small amount of coffee and grind a test dose. The first few grams help clear remaining cleaning dust and confirm that the chute is open. Listen for scraping or unusual resistance. If the sound changed after assembly, unplug the grinder and check seating before using it again.
How Often Should You Clean It?
A quick brush every one to two weeks works well for a grinder used daily. A deeper monthly or bimonthly cleaning is reasonable for many households. Clean sooner if grounds exit slowly, the grinder retains more coffee than usual, settings become inconsistent, or the cup tastes rancid despite fresh beans.
Dark, shiny beans leave more surface oil than lighter roasts, and flavored coffee can leave persistent aromas. Switching between espresso and filter settings also moves trapped grounds. These conditions justify a shorter interval.
Conical and Flat Burr Cleaning Differences
Conical grinders commonly have a removable upper burr surrounding a fixed inner cone, which gives a brush access from above. Flat-burr grinders may place two discs deeper inside the machine and sometimes require a manufacturer-specific access panel. The cleaning goal is the same, but the disassembly path is not.
Do not assume a video for a similar-looking grinder applies to yours. Retaining tabs, left-hand threads, shims, and calibration points can differ even within one brand. Use the exact model number when locating instructions, and stop at routine user-serviceable parts.
Common Cleaning Mistakes to Avoid
Do not immerse the grinder body, rinse an electrical burr chamber, blow debris deeper with compressed air, or scrape burrs with hard metal tools. Avoid changing calibration screws that are not part of routine cleaning. Strong fragrances and household cleaners can transfer odors to coffee.
Most importantly, do not rush drying. Coffee grounds absorb moisture quickly and can form a dense paste inside the chute. A few extra hours of air drying is easier than clearing a new blockage.
Frequently Asked Questions
Can I clean a burr grinder with rice?
It is better not to use uncooked rice unless the grinder manufacturer specifically approves it. Rice can strain some motors and leave starch dust. Use a brush, vacuum, or approved grinder-cleaning tablets.
Can burrs be washed with water?
Usually burrs and the burr chamber should remain dry, especially when made of steel. Wash only components the manual identifies as washable and dry them completely.
Why does my grinder still smell stale?
Oils may remain in the chute, burr carrier, or grounds bin. Repeat a dry cleaning and wash approved removable plastic pieces. Flavored coffee aromas can take several cleaning cycles to fade.
Do grinder-cleaning tablets replace brushing?
Tablets can absorb oils and move residue through compatible grinders, but they do not remove every trapped particle. Periodic brushing and chute cleaning are still useful.
Final Thoughts
A clean burr grinder protects the flavor of fresh beans and makes daily dosing more predictable. Unplug first, keep the motor and burr chamber dry, brush thoroughly, wash only approved removable pieces, and allow complete drying before reassembly.
Set a routine based on use rather than waiting for a blockage. A two-minute weekly brush and an occasional deeper cleaning prevent most buildup without unnecessary disassembly.
Leave a Reply